In the bustling world of e-commerce, the ability to track every click, every sale, and every customer interaction is not just an advantage; it is essential for survival and success. The data gleaned from effective tracking practices lays the groundwork for informed decision-making, strategic marketing, and ultimately, amplified profitability. Shopify, a leading e-commerce platform, understands this necessity and equips online store owners with various tracking tools to navigate the digital landscape effectively.
Shopify tracking stands at the core of this data-driven approach, offering merchants the key to unlock insights into customer behavior, campaign performance, and overall store activity. Beyond simply monitoring sales, tracking within Shopify encompasses a wide array of metrics crucial for refining the online shopping experience and scaling business operations. As we delve into the realms of Shopify’s tracking capabilities, from its native solutions to advanced integrations, this comprehensive guide will become your roadmap to navigating the vast ocean of e-commerce data, helping you to harness its potential to steer your online store towards boundless success.
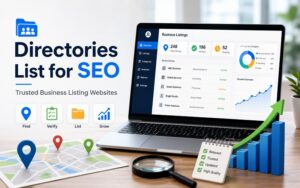
Section 1: Understanding Shopify’s Native Tracking Options
Shopify offers a range of tracking capabilities that cater to different business needs. The platform’s native tracking options include order management, shipping, inventory management, and return management. These tools help businesses streamline and speed up fulfillment processes, with features like smart order routing and end-to-end automation. Shopify’s inventory management system allows real-time syncing across locations and channels, helping businesses avoid over and under-selling issues.
One of the key integrations Shopify offers is with Google Analytics 4 (GA4). This integration allows merchants to generate various eCommerce analytics reports, providing insights on product performance, sales paths, user behavior, and more. Key reports include Enhanced eCommerce Report, Goal Flow Report, and User Flow Report, each offering unique insights such as conversion rates, shopping analysis, visitor navigation, and sources of traffic.
Despite these robust features, Shopify’s built-in tracking solutions have limitations. For instance, the availability of certain reports and analytics depends on the Shopify plan a merchant subscribes to. Basic plans offer limited analytics features, while more advanced features like custom reports are available only on higher-tier plans like Advanced Shopify and Shopify Plus.
Moreover, while Shopify’s native tools offer a comprehensive view of store performance, they may not cover all the analytics needs of a business. This is where third-party analytics tools can be useful, providing in-depth insights that Shopify’s native tools might not offer. Tools like Conversific, Power BI, LittleData, and Grow offer various features ranging from competitor performance comparison to detailed data visualizations and can be integrated with Shopify for enhanced tracking capabilities.
To set up native tracking for Google Analytics 4 (GA4), Google Ads, and other digital marketing tools on Shopify, you need to follow a series of steps for each platform. Here’s a detailed guide:
Implementing GA4 E-commerce Tracking on Shopify involves a series of steps to ensure accurate data collection and reporting. Here’s a detailed guide:
Step-by-Step Guide to Configure GA4 E-commerce Tracking on Shopify
- Create a GA4 Property: First, create a Google Analytics 4 property in your Google Analytics account if you haven’t done so already.
- Get Your GA4 Measurement ID: Find your GA4 Measurement ID in the GA4 interface, which typically looks like
G-XXXXXXX. - Add GA4 ID to Shopify: Log in to your Shopify store, go to ‘Online Store’ -> ‘Preferences’. Under the Google Analytics section, paste your GA4 Measurement ID.
- Enable E-commerce Tracking in GA4: In your GA4 property, go to ‘Admin’ -> ‘Data Streams’ -> Select your web stream -> Turn on ‘Enhanced Measurement’. Ensure that the E-commerce toggle is turned on.
- Check Your Data Layer: Verify that Shopify is sending e-commerce events to GA4. You can use the browser’s developer tools to inspect the network traffic or use a tag debugger.
Differences in Implementation Between Shopify’s Basic and Plus Plans
- Data Layer Access: Shopify Plus offers more direct access to the checkout process, allowing for more detailed customization of the data layer. This is limited in the basic plan.
- Custom Reports and Tracking: Shopify Plus allows for more advanced tracking and custom reports, which might not be available in the basic plan.
Tips for Adding GA4 Tracking Code
Using Global Site Tag (gtag.js)
- Direct Insertion: You can directly insert the GA4 global site tag (gtag.js) in the Shopify theme. Go to ‘Themes’ -> ‘Actions’ -> ‘Edit code’. Insert the gtag.js script in the
<head>tag of your theme.liquid file.
Using Google Tag Manager (GTM)
- Setup GTM Container: Create a GTM container and add the GTM container snippet to your Shopify store. This involves editing your Shopify theme to insert the GTM container codes in the header and body sections.
- Configure GA4 Tag in GTM: Within GTM, configure a new GA4 configuration tag. Set this tag to fire on All Pages.
- Set Up Triggers: In GTM, set up triggers for various Shopify events you want to track, like ‘add to cart’, ‘purchase’, etc.
Creating and Configuring the Data Layer for Shopify Events
- Customize Data Layer: For advanced tracking, you might need to customize the data layer on your Shopify store. This involves editing the Shopify theme files to push specific events and data into the data layer.
- Use Data Layer Variables in GTM: In GTM, use data layer variables to capture specific information from Shopify events for GA4 tracking.
Verifying and Ensuring Proper Functioning of GTM and GA4 Tracking
- Use Preview Mode in GTM: Use GTM’s preview mode to test and debug your tags. This will help you ensure that the tags are firing correctly on your Shopify store.
- Check Real-Time Reports in GA4: In GA4, use the real-time report to check if data is being received. Look for events like page views, add to cart, and purchases to confirm proper tracking.
- Use Google Tag Assistant: Google Tag Assistant can be used as a Chrome extension to validate the GA4 implementation on your Shopify store.
Setting Up Other Digital Marketing Tools
Many other digital marketing tools (like Facebook Pixel, email marketing tools, etc.) can be integrated with Shopify. The general steps are:
- Create Account and Get Tracking ID: Sign up for the tool you want to use and get its tracking ID or pixel code.
- Add Code to Shopify: Navigate to the appropriate section in Shopify’s ‘Preferences’ or ‘Themes’ (sometimes you might need to edit the theme code) and paste the tracking ID or pixel code.
- Configure Settings: Each tool has specific settings; configure them according to your marketing needs.
- Test and Verify: Always test to make sure the integration is working correctly by triggering test events or using the tool’s testing functionality.
Notes and Best Practices
- Stay Updated: Regularly check for any updates or changes in Shopify and GA4 documentation as both platforms are continuously evolving.
- Test Thoroughly: Before finalizing the setup, test thoroughly to ensure data accuracy.
- Data Privacy Compliance: Ensure that your tracking setups comply with data privacy laws like GDPR.
- Regular Monitoring: Regularly monitor your tracking tools to ensure they are collecting data accurately.
- Use Shopify’s Documentation: Shopify provides detailed documentation and support for setting up various marketing and tracking tools, which can be an invaluable resource.
The Role of Google Ads Conversion Tracking in Shopify
Google Ads conversion tracking in Shopify is crucial for understanding how customers interact with your ads and their subsequent actions on your store, like purchases or form submissions. This tracking helps you measure the effectiveness of your ads and optimize campaigns for better returns.
Methods for Setting Up Google Ads Conversion Tracking
Using the Google & YouTube App: This method is relatively easier and involves linking your Google account to Shopify. You’ll need to have a Google Merchant Center account, which can be created for free. The setup is done through the Google & YouTube app in Shopify, where you link your accounts and set up product feed settings.
Manual Code Setup: This approach requires you to manually create a conversion action in Google Ads, install a global site tag on your Shopify site, and add an event snippet for tracking conversions.
Detailed Steps for Manual Google Ads Conversion Tracking Setup
Create a Conversion Action in Google Ads: Access your Google Ads account, navigate to the Measurement tab, and create a new conversion action. Choose ‘Website’ as the conversion type, input your website URL, and set up conversion action details, like selecting ‘Purchase’ for the goal and action optimization.
Add Google Tag to Shopify: Install the global site tag in your Shopify store’s theme. This involves editing the theme.liquid file and adding the Google Tag code after the <head> element.
Add the Event Snippet to Shopify: Copy the event snippet from Google Ads and paste it in the ‘Additional scripts’ box in your Shopify admin under Settings > Checkout. Ensure to make adjustments to cater to different currencies and transaction IDs.
Make the Conversion Value Dynamic: If your store offers products at various price points, edit the event snippet to reflect different values for each transaction. This can be done by modifying the ‘value’ parameter in the event snippet to include or exclude taxes and shipping.
Troubleshooting Common Issues with Google Ads Conversion Tracking
No Conversion Data: This may indicate a problem with the setup. Ensure that the global site tag and event snippet are correctly installed on your Shopify site.
Duplicate Conversion Tracking: Ensure that other scripts don’t conflict or prevent the conversion tracking from firing correctly.
Debugging: Use GA4 Reports and Browser Console with Google Analytics Debugger to spot and fix any issues. Debug mode in Google Tag Manager can also be helpful for real-time event tracking analysis.
Test Conversion Tracking: Perform a trial transaction and check if the conversion is registered in Google Ads. Verify the setup by analyzing page views on conversion pages and monitoring conversions in your Google Ads account.
Integrating Shopify with Facebook Ads can significantly enhance your e-commerce business by tapping into a massive audience base on social media, particularly Facebook. This integration streamlines the customer journey, increases visibility and reach, enables targeted advertising, and builds trust through social proof.
Prerequisites for Shopify and Facebook Integration
Before integrating Shopify with Facebook, ensure you have:
- A Shopify account with an active store.
- A Facebook Business Page.
- Compliance with Facebook’s commerce eligibility requirements, including clear refund and privacy policies and ownership of the domain you intend to sell from.
Steps for Setting Up Shopify Facebook Integration and Facebook Ads
Add Facebook as a Sales Channel:
-Log into your Shopify Admin and click on the plus button in the “Sales Channels”.
-Search for “Facebook” and click on the plus button beside it to add it.
Integration Setup:
-Click “Start Setup” on the Facebook Shop in your Shopify Admin.
-Connect your Facebook account, Business Manager, and Facebook Page.
-Enable “Data Sharing” and choose the data-sharing level.
-Connect your Facebook Ads Id and set up your Facebook Shop.
Product Syncing:
-Sync your Shopify products with Facebook by making them available to the Facebook channel in your Shopify admin.
Facebook Pixel Integration:
-Enable Customer Data-Sharing in Shopify’s Facebook sales channel settings.
-Connect your Facebook Pixel or select it from the list.
-This Pixel tracks various user activities on your Shopify store, like page views and purchases.
Creating Audience Building Ads:
-In Shopify, navigate to ‘Marketing’ and select ‘Create Campaign’.
-Click ‘Facebook audience building ad’ and follow the prompts to set up the Facebook marketing section.
Configuring and Using the Facebook Pixel for Targeted Advertising
The Facebook Pixel is crucial for targeted advertising. It collects data about user behavior on your Shopify store, enabling targeted and retargeted ads. The Pixel tracks events like page views, searches, add to cart actions, and purchases. This data is essential for creating relevant ads that reach the right audience at the right time.
Steps for Setting Up Shopify Facebook Audience Building Ads
- Navigate to ‘Marketing’ in Shopify and choose ‘Create Campaign’.
- Select ‘Facebook audience building ad’.
- Follow the setup prompts in the ‘Facebook Marketing’ section.
- Connect your Business Manager, Facebook Page, and Pixel during the setup process.
- Choose a target country for your ads and complete the setup.
Monitoring and Optimizing Facebook Ad Campaigns for Shopify
Regular monitoring and optimization of Facebook ad campaigns are vital. Use Facebook Insights and Shopify analytics to track the performance of your ads. Pay attention to metrics like click-through rates, conversion rates, and cost per acquisition. Based on these insights, adjust your campaigns for improved performance. Test different ad formats, audience segments, and bidding strategies to find what works best for your specific audience and products.
By following these steps and best practices, you can effectively leverage the power of Facebook Ads to grow your Shopify store’s reach and sales.

Conclusion:
In conclusion, Shopify tracking is an indispensable asset for e-commerce entrepreneurs aiming to gain a deep understanding of their online store’s performance.
With native Shopify tracking options and the integration of powerful tools like Google Analytics 4, Google Ads, and Facebook Ads, merchants are equipped with the insights needed to make data-driven decisions that enhance customer experiences and drive sales.
By meticulously setting up and optimizing these tracking solutions, and remaining compliant with privacy regulations, Shopify store owners can not only keep a pulse on their business but also continuously refine their marketing strategies for sustained growth and e-commerce success.
Useful references: